Create a Site with WordPress: Configure the Database

YNOT EUROPE – We finally have arrived at the last preparatory step before the installation of the popular WordPress content management system.We have seen how to configure Apache, how to change the root password for MySQL, and now we will discover how to create a database suitable for our future site.
The preparatory steps have been a bit long but necessary for what will be a perfect WordPress installation that does not require further action unless some unexpected challenge arises.
The purpose of this article is to create a database specific to our website as well as a user with the necessary permissions.
Creating a database
Creating a new database always is accomplished via the phpMyAdmin administration panel which, I remind you, you can reach by clicking the left mouse button on the WAMP speedometer near the clock and then selecting the corresponding item.
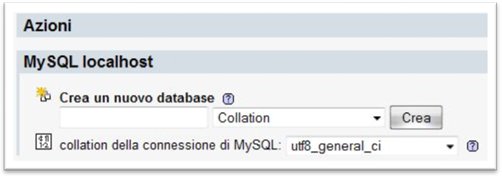
By selecting the Database tab from the available options, you will be presented with a dedicated field for creating a new DB, as you can see the image below:

In the first field, enter the name of the DB you want to create. Typically, it is most convenient to choose a name that echoes the website’s name, then add a suffix or a prefix containing the string DB. Click on the “Create” button, and you will see a message confirming creation.
To further confirm the creation of the database, check to make sure the chosen name appears among the list in the left-hand column of the phpMyAdmin administration panel.
Creating a user
For security reasons and to ensure WordPress can access to the database, we will create a user specifically for this database.
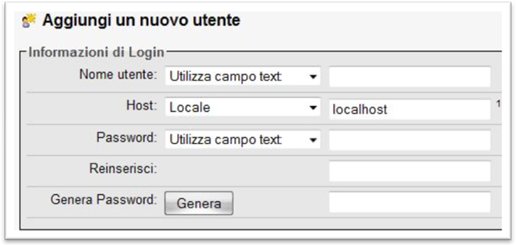
Again, navigate to the PhpMyAdmin administration screen, and this time choose the tab for “Privileges,” as we did when we set a password for root. Then select “Add a new user” (the option will appear directly underneath the list of current MySQL users). You will see a screen like that looks like this:

Choose a user name and type it into the first field. Choose the correct “Host” from the drop-down menu, and the system automatically will add the string “localhost” to the adjacent field.
Enter an appropriate password in the next two fields.
When finished, click on the button at the bottom right of the screen and you’ll see the message, “You have added a new user.”
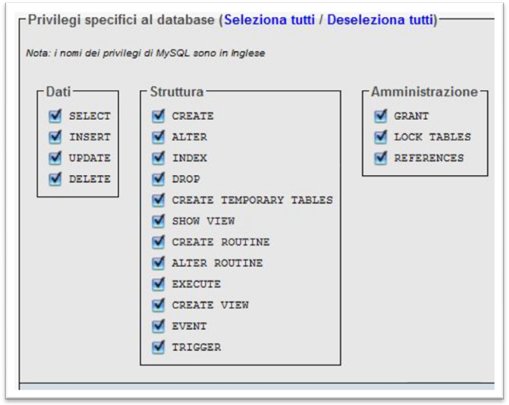
At this point, we need to give the correct privileges to the new user. In the same screen where you see the message above, identify the menu shown in the image below:

Select the DB you created earlier from the menu entry, and the page will reload. Near the top of the page (as noted in the figure) select “select all” (you will see a check mark next to all entries), and then click the “Run” button in the lower right.

At this point, all configuration tasks have been completed. The next article in this series will explain how to install WordPress on your PC.
This article was written for YNOT Europe by Eng. Antonio Lodesani. For more information, visit ingoccupati.blogspot.com.

Comments are closed.


